Hi guys! I have something amazing to share with you today. As I'm sure you know, I'm a big fan of bread (AKA all the toast). But actually baking bread? The kind with rising yeast? Not really a thing I do. Sounds complicated and hard yes? All that kneading, making sure you don't over heat the yeast, gluten activation yada yada...no thanks right? Well actually, what if I told you I hopped on board this whole no-knead bread craze and told you it's AWESOME?! That's right! Foolproof Artisan No Knead Bread!!!
It's SO easy!!! Literally 5 ingredients to the perfect round bread loaf. Not going to lie, I even managed to add too much flour the first time I attempted this, kinda guestimated my way of it and it still turned out fabulous. It's legitamentally foolproof and you can make it with almost no effort at all!
Ok. Lemme prove it to you. Foolproof Aristan No Knead Bread with 5 ingredients in 5 steps:
- Activate.
- Mix
- Rest.
- Shape
- Bake.
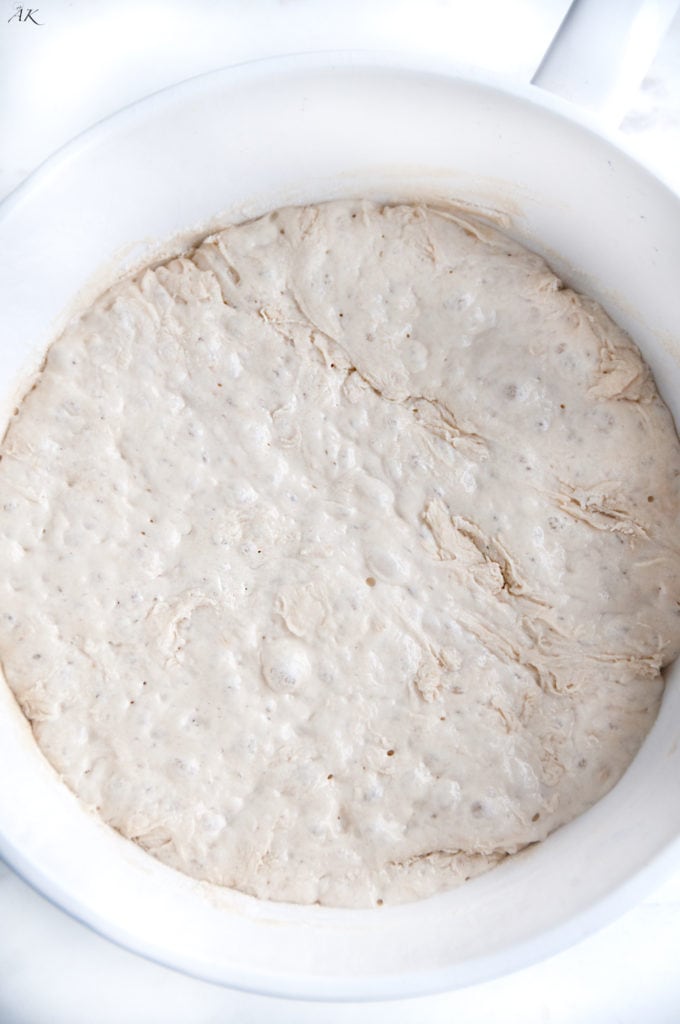
Told you!!! You don't even need tips and hints here. It's so wonderfully simple. Go from this⤵️
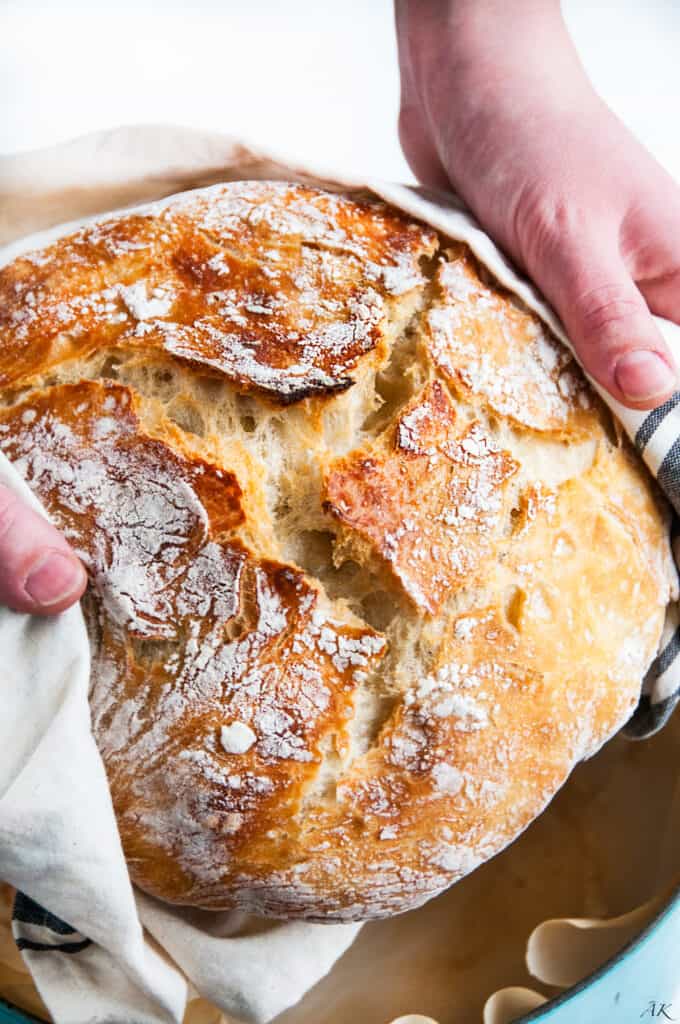
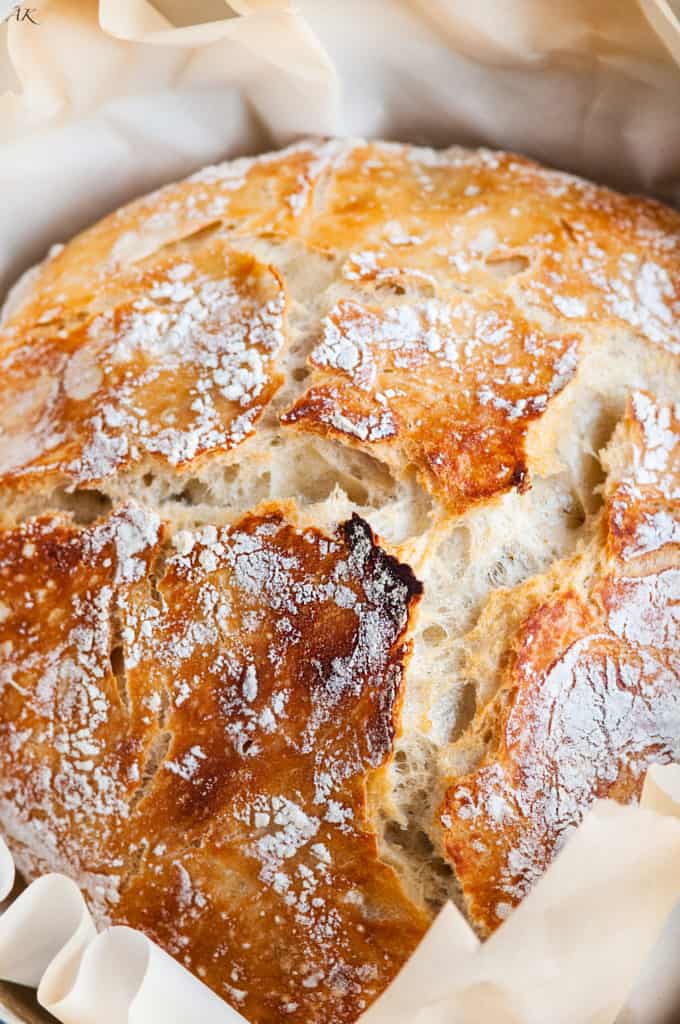
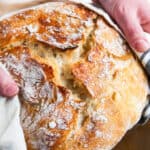
To THIS ⤵️ without kneading!

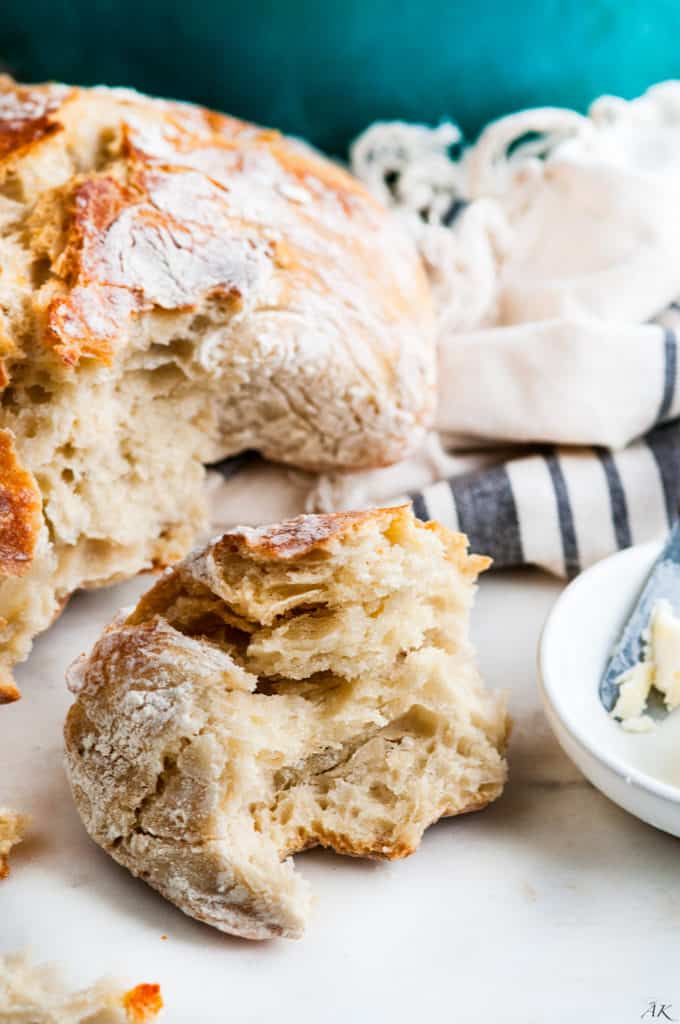
Also? It's SO delicious. Taste's just like that $7.99 loaf of artisan french bread at the store but this one costs pretty much nothing to make! Yeast, salt, flour, water. Done. You also get to tell everyone you make your own bread. SO snazzy! Plus, this recipe is super soft on the inside and perfectly golden crunchy on the outside....???????????? Simple flavor, perfect for dipping in all your favorite holiday/winter soups, and also just excellent for slathering butter on and eating by itself! So skip the bakery next time around and try out this Foolproof Artisan No Knead Bread!
Foolproof Artisan No Knead Bread
- Total Time: 12 hours 45 mins
- Yield: 1 large round loaf 1x
Ingredients
- 3 cups all purpose flour
- 1 ¾ teaspoon coarse salt
- ½ teaspoon active dry yeast
- ¼ teaspoon white sugar (for activing the yeast)
- 1 ½ cups warm water (heated to between 105 and 110°F.)
Instructions
- Activate the yeast: Pour warm water into a small bowl. Sprinkle yeast on top. Add sugar and give the mixture a small stir. Place the bowl in a warm place for about 10-15 minutes. Be patient! If yeast is activated, you will see foam on top of the mixture, and even a few small bubbles. Also, if you take sniff, it will smell very much like yeast.
- In a large bowl, whisk together flour, and salt. Add water and yeast mixture and mix until just combined into a sticky, shaggy dough. Cover the bowl with plastic wrap and let sit for 12-18 hours. After the dough has risen for at least 12 but preferably 18 hours, it should look loose and very moist with plenty of bubbles on the surface.
- When the dough is ready, preheat the oven to 450˚F. Place a 6 to 8qt dutch oven or cast iron pot in the oven to heat up for 30 minutes before baking.
- Place dough on a well floured surface and, using plenty of flour on your hands, gently pat it into a ball shape. Score the top of the dough as desired.
- Place it onto a piece of parchment paper, sprinkle the top of the dough with more flour, and cover with saran wrap while you wait for your pot to heat up.
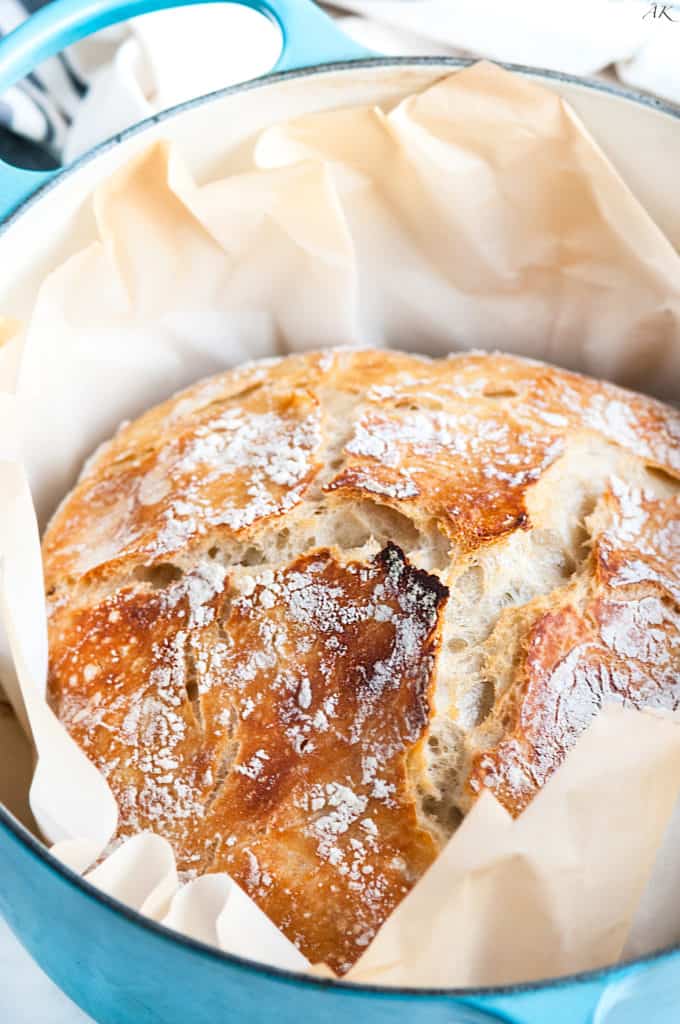
- Remove the saran wrap and place both the parchment paper and the dough into the heated pot so that the parchment lines the bottom. Place on a middle rack and cook, covered, for 30 minutes. Remove the cover and cook another 10-15 minutes, until bread is golden. Cool on a wire rack.
Notes
Unless, I check the temperature with a literal thermometer, I've always had to try twice to activate the yeast! So if it doesn't activate the first time you try, no worries. Be patient and try again with another ½ teaspoon of yeast.
- Prep Time: 12 hours
- Cook Time: 45 mins
Lauren says
Can you use bread flour?
Aberdeen says
Hi Lauren,
I've only used all-purpose flour for this recipe so I can't say with confidence what would happen if you used bread flour. However, I think that it'd be worth a try! If you do end up using bread flour, let me know how it turns out :-).
Sarah Killaire says
Absolutely love this recipe, I have made multiple loafs and shared the recipe with friends! I tried using everything bagel seasoning on top and it was delicious! Wanted to asked your thoughts on adding honey to the mix and sprinkling oats on top? Do you think adding the honey would create any issues?
Aberdeen says
Thank you so much 😊. I think that is a GREAT idea, shouldn't have have effect on the bread. Definitely give it a try!
Lauren says
Can I use my bread proof button on my oven? I think it makes my oven 100 degrees. Just wondering if that would help for placing it somewhere warm.
Aberdeen says
Absolutely! I do that all the time. Make sure to use an oven safe bowl just in case and cover it with saran wrap.
Susan says
The stores in my area are out of active yeast. One store was able to stock Saf-instant yeast. Can that be used? Would I add it to the flour or would I need to activate the yeast?
Deborah says
I always use SAF instant yeast. It’s great. I made a very similar recipe, no problems. If you buy a large amount of yeast, keep most of it in the freezer - lasts forever. Have fun!
Colleen Ray says
Abby, I made this bread today and it was soooo simple. It tasted great, has a nice texture and is just as pretty as your pics show it to be. Definitely going go be making it again! Thanks for the recipe 🙂
Aberdeen says
Thank you!! You're so welcome 🙂
Sacra says
Hi,could be this type of bread be baked without the pot?just in a oven tray?
Thanks
Aberdeen says
It can! It won't have quite as nice a crust but it will work. Make sure to use an oven safe baking dish and still use the parchment paper plus some kind of covering (foil is okay).
Mariela says
I use a cast iron skillet and throw about 8 ice cubes in the bottom of the oven right before I shut the door to create steam because I don't have a dutch oven. It works great for making a good crust.
Lizzie says
Looks fantastic! But all I have is a 4-quart All Clad straight-sided soup pot ... think that would work?
Aberdeen says
Thank you! If it's oven safe up to 450 degrees F it should be ok. Also, you'll want a lid but if it isn't oven safe you can use aluminum foil to top the pot instead. Let me know how it goes!
Lizzie says
My All Clad is stainless so oven-safe to a gazillion degrees. I'll for sure let you know how it turns out. Thanks.
Lizzie says
This bread is fantastic. Baked it today after letting it rise for an additional 2 hours (per the New York Times recipe) and dusted it with cornmeal. My All Clad soup pot was perfect. This is not an easy bread to slice -- more of a pull-a-hunk loaf. Thanks again, just fabulous.
Aberdeen says
That's great!! I'm so happy it worked out for you.
Mary Spear says
Hi, does the bread need to be scored before baked?
Thank you
Aberdeen says
Nope! You can throw it right in the oven. If you do want to control where any extra pressure comes out of the bread, go ahead and give it a score or two.
Joseph says
I saw the yeast activate, put it in a large bowl covered with saran wrap for 18 hours. I came back and smelt very strong it almost knocked me out. I tried to shape it but its just all sticky and keeps sinking flat and I cant form it into a ball. What did I do wrong...
Aberdeen says
Hi Joseph!
I'm so sorry this didn't turn out for you! My best guess is the climate/weather can affect the rise of the bread. As for the stickiness. it's definitely a shaggier bread but if its so wet you can't form it, definitely just keep adding flour to it with your hands until you can shape it. Hope that helps!
June says
I love this recipe! It was so easy and tasted great! Have you tried to add sourdough starter to this recipe? If so how much and then do you leave out the active yeast?
Aberdeen says
I have not! I'm going to test out a sourdough starter this weekend, we'll see how it goes 😊.
Katie G says
This looks yummy! While letting it rise, do I refrigerate? Or let sit on the counter? My kitchen stays about 65 degrees during this time of year.
Aberdeen says
Definitely let it sit on the counter, preferably in a the warmer place. Mine hangs out on a table by our ridiculous monster of a heater or on top of my refrigerator during the winter. Once the weather starts to warm up I just leave it on the counter!
Linda says
Hi! My Dutch oven from Lodge says not to heat an empty Dutch oven. What do I do for the step that says heat the Dutch oven for 30 minutes?
Aberdeen says
Hello! Any pot or skillet and/or any lid that is oven safe and can withstand a high temperature in an oven will work. You can also try using a casserole dish with a lid that will also handle high heat, you'll just end up with a different shaped bread. Also make sure to place whatever you use in the oven as it preheats!
Adriana says
Hi I use my Dutch oven often and preheat it with no issues
Tammy says
I have made this bread recipe 6 times already. We love it and it’s super easy. I saw a comment on cutting it. I tried using an electric knife (like for cutting a turkey) and it worked great!!! It looked like the loaf you buy from a bakery! Thanks for sharing.
Mandy says
Have you ever tried doubling the recipe and making an extra large loaf?
Aberdeen says
I have not but once I do I'll update the recipe with notes!
liberty says
hello, my bread is currently in the oven and I'm loving this recipe already !! i was wondering if it worked well doubled ? id love to double it sometime and send a loaf to a friend but wondering if this recipe held well when doubled ?
Aberdeen says
I havn't tried it doubled yet, I'll give it a test run soon and update the recipe with notes 👍🏻.
Julia says
This is the second recipe I have made exactly and my dough will not form a into a ball after it's risen for 18 hours. It's slimy and sticky. I understand it's suppose to be sticky but I have seen videos and it never comes together and I'm not sure I understand why. The ingredients were measured and I had new yeast, everything. I'm baking it currently so we'll see if it comes out better than the first one :/
Debbie says
It is possible that a very warm rising place caused the yeast to over activate. When it is very warm, the starter (water, flour and yeast found on the grain that was ground) will bubble up really fast and collapse once it has used up its food. To feed the starter & recharge it, I add more flour and an equal amt of water (by weight).
This recipe, of course, is not sourdough, but does use yeast. Once the dough has risen for this recipe, overhandling it may be causing it to lose its internal gas bubbles so that it collapses and doesn't hold shape. That's my theory. I've been trying to learn how to make sourdough bread over the past year and do not declare myself an expert at this time.
Aberdeen says
Hi Julia, so sorry this has happened to you twice! How much flour are you adding?
Chi-Cha says
My pot could not heat to 450- I tried 400 but it didn’t work very well! Thought if I cooked it longer it would work. Also the dough didn’t look bubbly - maybe my yeast didn’t work. I’ll try again, as I’ve had this bread and it’s delicious!
Aberdeen says
Hello! In place of the pot, do you have a large casserole dish that could heat to a higher temp? You can try using that instead along with the parchment paper plus a little foil around the outside to help keep the loaf shape. Also, yeast can be SO frustrating. If you have a thermometer, temp the water at anywhere between 105 to 110°F to ensure the yeast will activate. I realize this wasn't in the recipe so I've updated it, hopefully this helps!
H says
My dough rose really well but was extremely loose and sticky. I did manage to make it into a blob, as it basically collapsed, and get in on the parchment and into the pot. It looks and smells lovely, but looks smaller than yours. Not eaten it yet, but wondering what may have gone wrong
Aberdeen says
So sorry to hear that! Do you know how much flour you added? Would love to help you get a better batch next time!
Madhu says
Hi there! I attempted my first bread yesterday and it was delicious. My family said it beat the best breads that they have had. Thank you for a simple recipe like such. I have a question if there’s a process to make it in a long shape than round. That way we can have less concentration of thick flour in the middle. How can we shape this into a long French bread? Or can we break it into parts? The dough was barely manageable for the round shape! Please advise!
Aberdeen says
Hello! You can try baking it in a bread loaf pan to give more of a rectangular shape but as I havn't done that before I'm not sure how it would affect the cooking time. You can also try to shape it into a rectangle with your hands and bake as directed or cook it in two halves. Hope that helps!
LeConte says
Can I use instant yeast instead of dry active yeast? And will that change the proofing time or any other steps?
Aberdeen says
Yes you can, you would add the instant yeast directly to the flour along with the "proofing ingredients" aka the warm water and sugar. You would also use about 25% less than the amount of active dry in the recipe. I'm not sure about proofing but from what I've seen it might be a shorter amount of time. Just keep an eye on it!
lisa simmons says
What brand and size is your dutch oven? I love the tiffany blue!!! Making this bread as we speak💯
Aberdeen says
It's a 5 1/2 quart Le Creuset dutch oven in Caribbean blue. I absolutely LOVE it, well worth the $$$!
Nancy Fahlgren says
Can I use this recipe to make pizza dough. My family loved the bread and I’m thinking about trying to use this dough recipe to make pizza. Has anyone tried this?
Cathy says
An absolute wonderful recipe! I made my dough/bread now multiple times and it turns out perfectly every time!!!
Aberdeen says
Thank you so much!
M says
Can I leave it for more than 12-18hours? 24hrs?
Aberdeen says
That might cause the bread to over proof, I would strongly suggest no more than 18 hours.
Leslie says
I use this exact recipe except no sugar. It isn’t necessary to activate yeast or use warm water. Do everything else the same. It can rise up to 24 hours but I try to do 18. Any kind of yeast and any kind of flour.
Sheri says
So happy this recipe worked out well for me after having not much luck with other recipes.
Wondering if it will work with wholemeal flour? If so, what adjustments would need to be made (yeast,etc)?
Gina says
Hi, I've let my dough rise overnight, and I love how it looks so far! However, the only thing I have to bake bread in/on is a baking stone. Can I use a baking stone, and if so, do I need to cover it somehow, or create steam? This is my first time baking bread, so I'm not exactly sure what's necessary. Thank you!
Ann says
For the 18 hr rise should it be in a warm place or is the kitchen counter fine?
Ann says
Why heat the pot for an additional 30 minutes? Wouldn’t it be just as hot if it heats up with the oven?
Tammy says
LOVE this recipe I will keep it forever. I made this to go along with some garlic soup we made. It was AMAZING. My dough was a little wetter than most breads I have made so I was worried but it came out beautiful and was delicious. We fried the top crust in olive oil to make crispy croutons for our soup. YUM!!!!!
Thank you for this recipe!
Nancy C says
I’m a seasoned bread baker and I like this recipe. To say that it cost nothing to make it when compared to store bought breads is incorrect. There is the cost of running my gas stove , water used the cost of a good bread flour and all of the remaining ingredients not to mention my time. Oh and what about clean up?
Kristen says
I pinned this recipe way back when but just tried it today for the first time. Followed everything to the letter since I’m not the most reliable bread baker yet. The bread turned out perfectly! It didn’t brown as much as in your photos, but it is so delicious. I love the simplicity of this recipe, and it was the perfect size for just the two of us to finish in a few days. So easy and a total go-to from now on!
Jan says
Finally, a recipe that is not too dense. Have you experimented with adding other flavorings (Italian, parmesan, rosemary for example)?
Gloria says
Followed instructions carefully, the bread came out of the oven with a beautiful crust, but inside, the bread was dense and wet, with visible streaks of white flour. 🙁 Any thoughts? Thank you.
Adriana says
Hi I use my Dutch oven often and preheat it with no issues
Adriana says
I made this recipe it's one of my very first attempts at bead and cam out amazing
One question. I doubled it today can I bake it on one loaf or does it have to be split into two